Redpanda Streaming Quickstart
Learn how to quickly start working with a local Redpanda cluster that comes with a free 30-day license for Enterprise Edition. You can also extend the trial license for a further 30 days.
Redpanda Streaming is a modern streaming platform, compatible with Kafka APIs, designed for speed, simplicity, and efficiency. In this quickstart, you:
-
Deploy a three-broker Redpanda cluster.
-
Explore streaming data in Redpanda Console.
-
Learn the basics of streaming with the Redpanda CLI (
rpk). -
Deploy a streaming pipeline with Redpanda Connect.
-
Learn how to extend your trial license for an additional 30 days.
|
This quickstart uses Docker to run Redpanda, which is only for development and testing purposes. For production deployments, see the Linux deployment guides or the Kubernetes deployment guides. To download the Redpanda binary, see GitHub. Looking for a managed solution? You can also get started quickly with a hosted Redpanda cluster by signing up for Redpanda Cloud. |
Enterprise features
The Enterprise Edition of Redpanda Streaming adds advanced capabilities to help scale, manage, optimize, and secure your cluster.
All new Redpanda clusters include a built-in 30-day Enterprise Edition license, so you can evaluate enterprise features. Some features highlighted in this quickstart require an enterprise license:
-
Redpanda Console Authentication: Securely control login access to Redpanda Console.
-
Audit Logging: Track and monitor all user actions in a Redpanda topic.
-
Continuous Data Balancing: Automatically balance data across brokers to optimize performance.
-
Tiered Storage: Lower storage costs by offloading log segments to object storage.
Your trial license also includes additional enterprise features. For more information, see Redpanda Licenses and Enterprise Features.
Prerequisites
You need the following tools and settings before proceeding:
-
tar (GNU tar): On most Linux distributions, GNU tar is preinstalled. On macOS, install GNU tar using Homebrew and ensure it’s used instead of the BSD version:
brew install gnu-tar -
Docker Compose: For installation instructions, see the Docker Compose documentation: Docker Compose documentation. To verify you have it installed, run:
docker compose versionYou should see the installed Docker Compose version.
-
Docker Desktop (macOS/Windows): Ensure that Docker Desktop’s file sharing is enabled for the directory where you plan to run the quickstart. If your working directory isn’t shared, containers won’t be able to see your files.
-
Available memory: Make sure your machine has at least 4 GB of free memory before starting the containers. If your resource limits are too low, some containers may hang or fail to start.
|
If you’re on Windows, use a compatible terminal that supports Unix-like commands (for example, PowerShell or Windows Terminal). Alternatively, you can use Windows Subsystem for Linux (WSL). For WSL installation instructions, see: Windows Subsystem for Linux (WSL). |
Deploy Redpanda Streaming
To download, extract, and start Redpanda Streaming in Docker, run:
mkdir redpanda-quickstart && cd redpanda-quickstart && \ (1)
curl -sSL https://docs.redpanda.com/25.2-redpanda-quickstart.tar.gz | tar xzf - && \ (2)
cd docker-compose && docker compose up -d (3)| 1 | Create and navigate to the redpanda-quickstart directory. |
| 2 | Download and extract the archive.
Explore the downloaded files
|
| 3 | Start Docker Compose. |
When the containers are running, you have:
-
A Redpanda cluster with a 30-day free trial license.
-
A running data streaming pipeline generating data into the
loginsandtransactionstopics. -
A Wasm data transform processing data from
loginsintoedu-filtered-domains. -
A secured instance of Redpanda Console with login authentication.
Explore Redpanda Console
Redpanda Console is a developer-friendly web UI for managing and debugging your Redpanda cluster and your applications. This section provides practical examples and scenarios to help you understand how to leverage Redpanda Console for different use cases, including data observability, Redpanda management, access control, and connectivity.
Redpanda Console was deployed as part of the docker-compose.yml file and is running locally on port 8080.
Log in to Redpanda Console
To start using Redpanda Console, you first need to log in with the credentials of a user. Redpanda is configured with a bootstrap SCRAM user called superuser, so you can log into Redpanda Console as that user (enterprise feature). This user has admin access to Redpanda and Redpanda Console.
-
Open your web browser and go to http://localhost:8080/login.
-
Enter the following credentials:
-
Username:
superuser -
Password:
secretpassword
-
Leave the SASL mechanism as SCRAM-SHA-256.
You should now see an overview of your cluster’s status, health, and brokers.
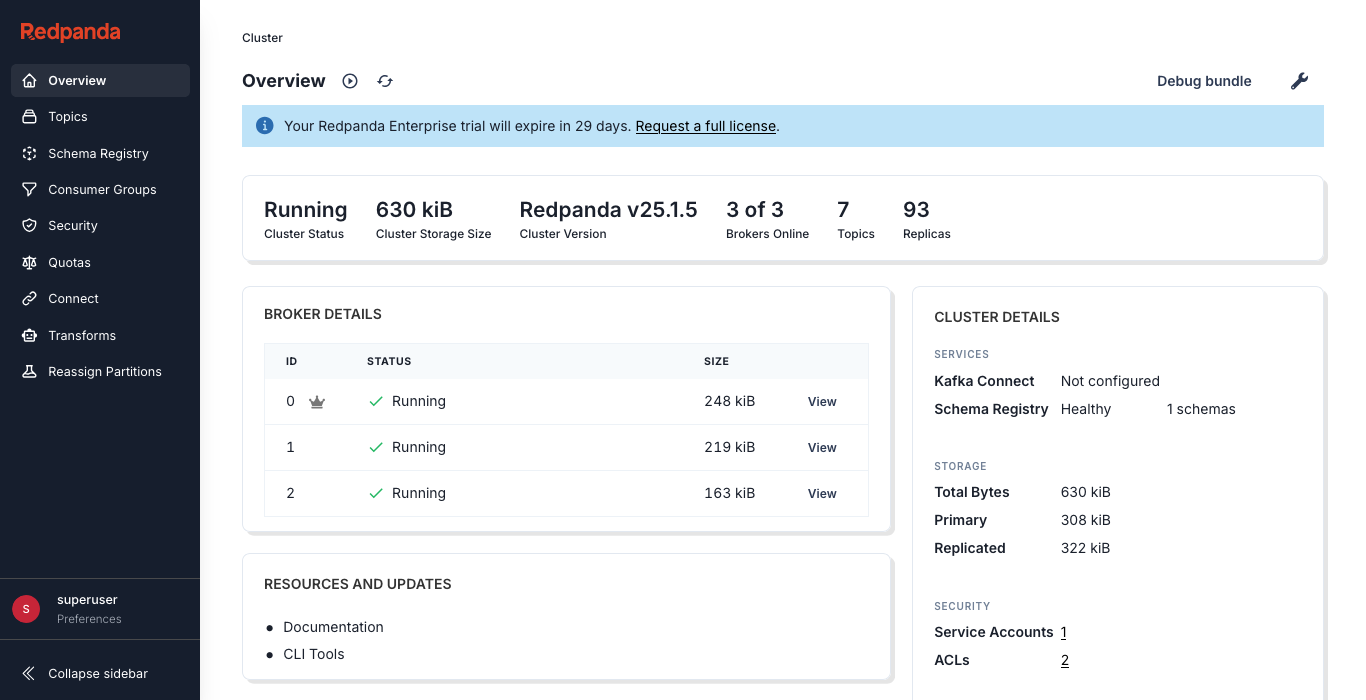
To view details about a specific broker, click View at the end of the row in the Broker Details table.
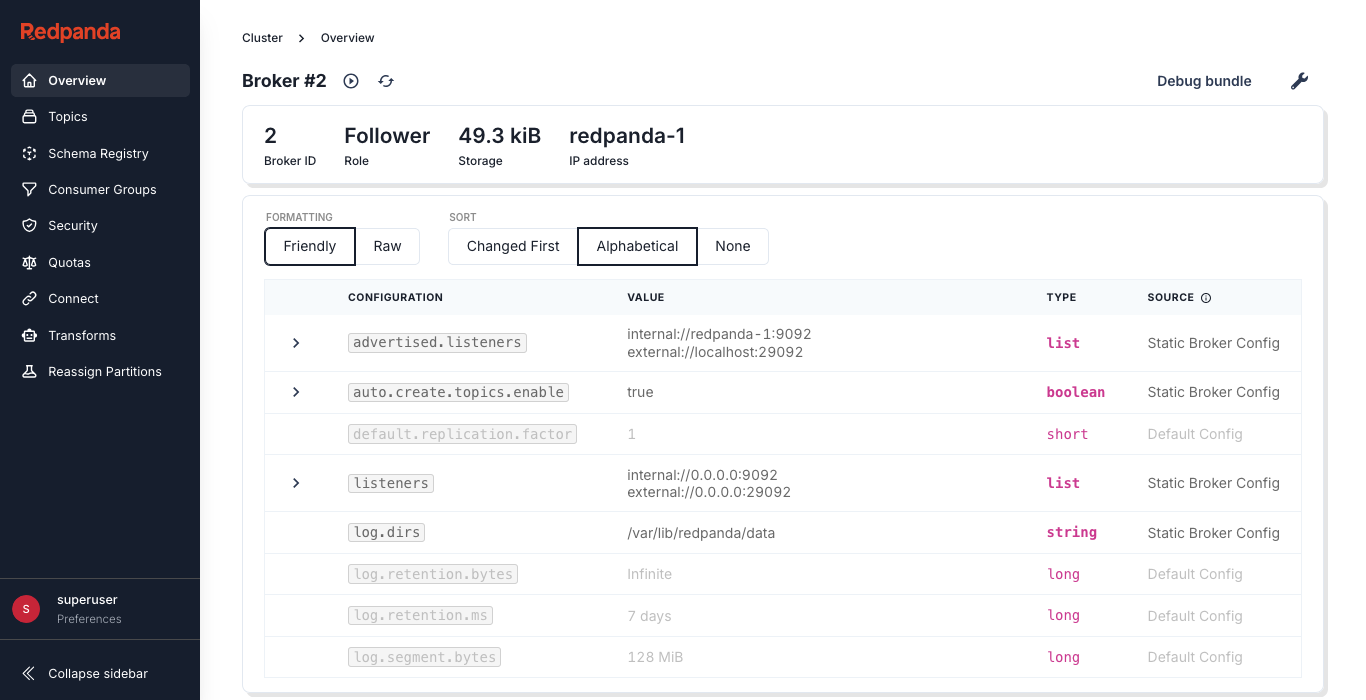
See also: Authentication in Redpanda Console.
View topics and filter messages
This quickstart deployment comes with two pre-configured topics, logins and transactions, actively receiving data from a Redpanda Connect pipeline. These topics simulate real-world data flows, enabling you to explore and interact with Redpanda Console features.
You can filter messages in topics using several methods:
-
Text search: Search for specific text within the message.
-
Partition offset filters: Set the start and end offsets to narrow down the message range.
-
JavaScript filters: Use JavaScript function bodies to create complex filters that run server-side, allowing you to filter through topics with millions of records.
Suppose you’re asked to find all transactions related to the .edu domain. You can use a JavaScript filter to display only messages that include email addresses in that domain.
-
In the menu, click Topics.
-
Click the transactions topic. When the topic’s page opens, the Messages tab is selected by default.
-
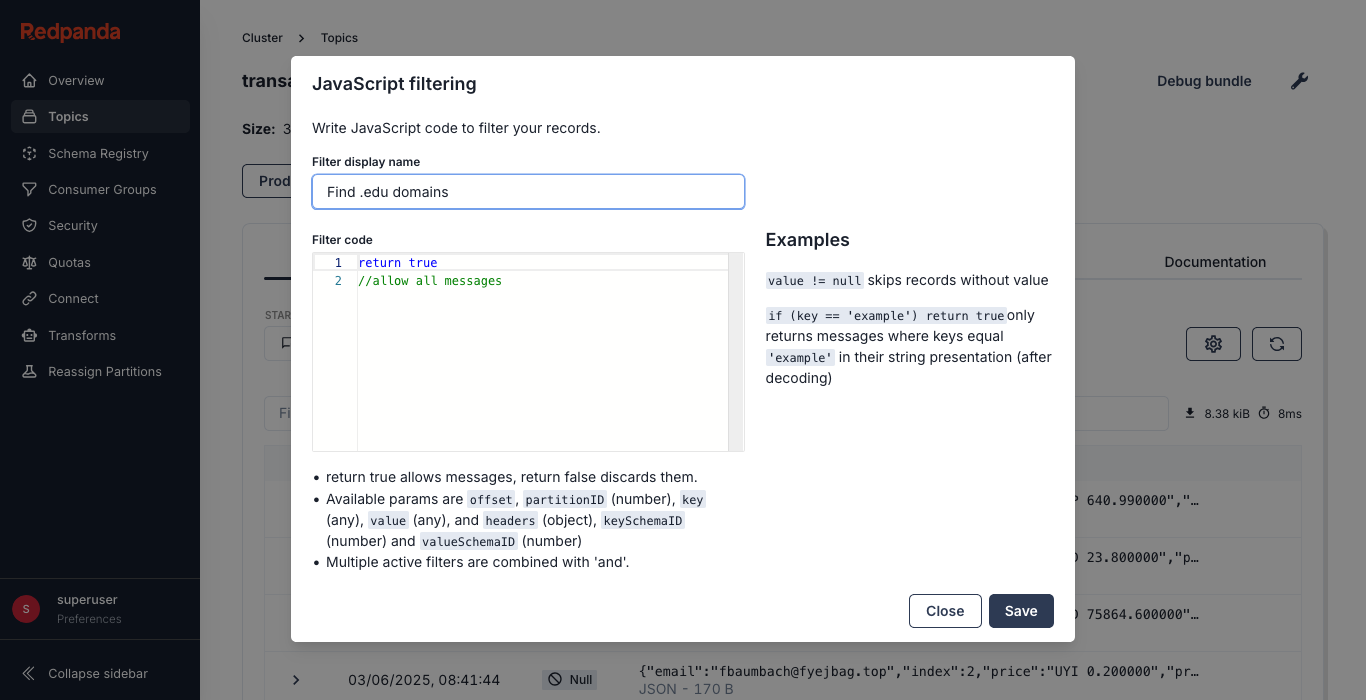
Click Add filter > JavaScript Filter.
-
Give your filter a name, such as "Find .edu domains".
-
Replace the default JavaScript code with the following:
return value.email.includes(".edu"); -
Click Save to apply the filter.
You should see only messages that include the specific domain.
By default, the filter runs on the newest 50 messages. You can run the filter on older messages by changing the start offset. For example, to start from the oldest messages, select Beginning.
Explore Schema Registry
On the Schema Registry page, you see an overview of your schemas. You can create, manage, and inspect your schemas without leaving Redpanda Console.
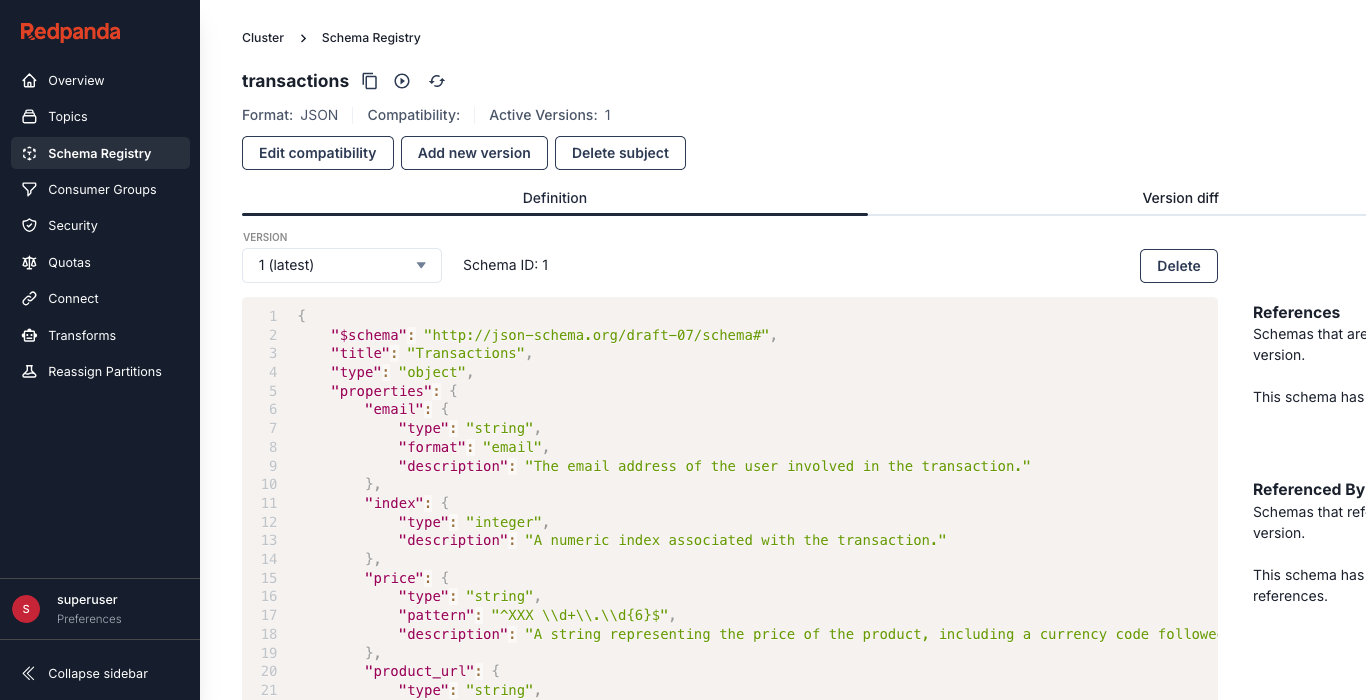
See also: Use Schema Registry in Redpanda Console.
Configure access control for Redpanda
Managing access control lists (ACLs) can be complex, but Redpanda Console simplifies this with an intuitive interface.
This quickstart deployment includes a bootstrapped superuser with full administrative privileges. The superuser has unrestricted access to all topics, consumer groups, transactions, and cluster-level operations. By default, the credentials for the superuser are:
-
Username:
superuser -
Password:
secretpassword
For improved security and role-based access control (RBAC), you should create additional users with restricted permissions as needed.
On the Security page, you can:
-
Create, view, and edit ACLs for topics, consumer groups, transactions, and the entire cluster.
-
Quickly understand what each principal (user) is authorized to do.
Suppose you’re onboarding a new team member who needs access to specific topics. You can use Redpanda Console to ensure users have the right permissions to perform their tasks.
-
In the menu, click Security.
-
On the Users tab, click Create user.
-
Enter "Sasha" in the username field.
-
Enter "sashapassword" in the password field.
-
Click Create.
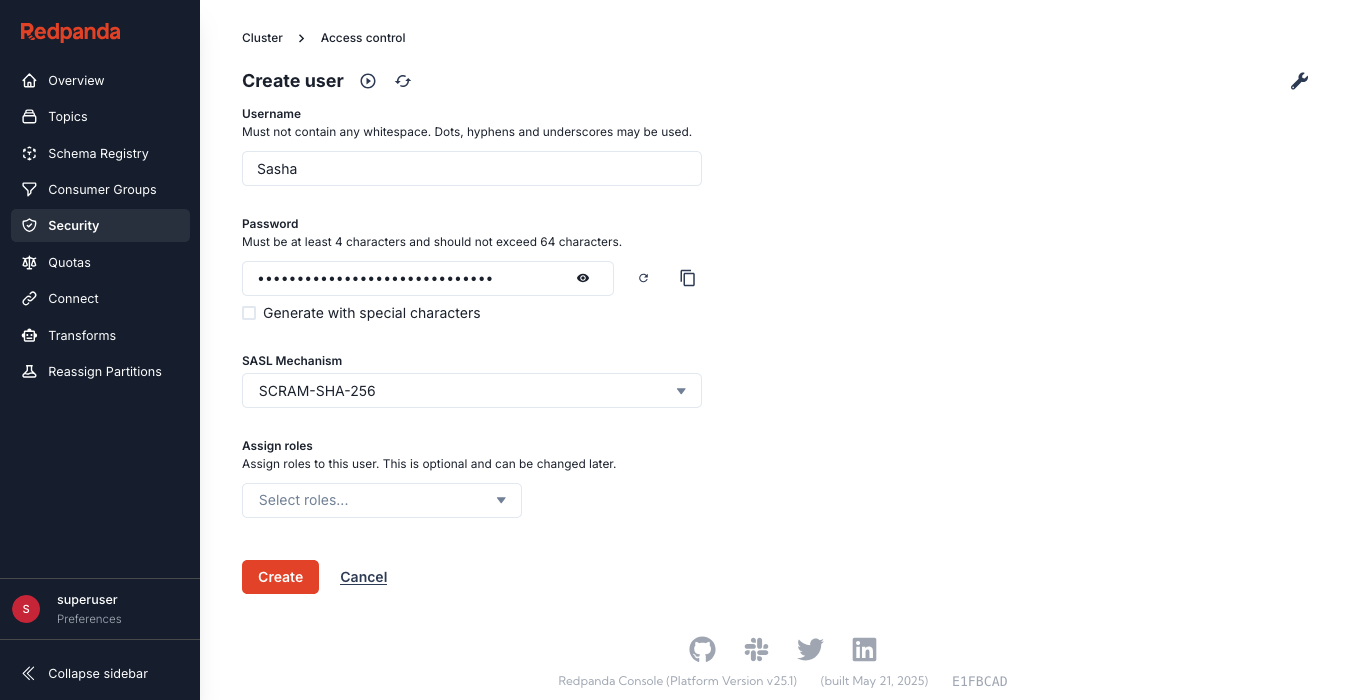
Click Done, and you see a new user called Sasha. This user has no permissions yet. To set permissions on the transactions topic:
-
On the Access control page, open to the Roles tab.
-
Click Create role.
-
Enter "transaction-managers" as the role name.
-
In the topic selector dropdown, select Literal and enter "transactions" in the input field.
-
Under Operations, click the All dropdown and select Allow.
-
Scroll down to the bottom of the page and under Principals select Sasha from the dropdown.
-
Click Create.
Now Sasha has full access only to the topic called transactions.
To test these permissions, use rpk to connect to Redpanda as the user Sasha.
-
Try to access the
loginstopic as Sasha:docker exec -it redpanda-0 rpk topic describe logins \ -X user=Sasha \ -X pass=sashapassword \ -X sasl.mechanism=SCRAM-SHA-256 \ -X brokers=redpanda-0:9092You are not authorized to view the topic.
SUMMARY
=======
NAME        logins
PARTITIONS  0
ERROR       TOPIC_AUTHORIZATION_FAILED: Not authorized to access topics: [Topic authorization failed.]

CONFIGS
=======
config response contained error: TOPIC_AUTHORIZATION_FAILED: Not authorized to access topics: [Topic authorization failed.]
-
Now try to access the
transactionstopic as Sasha:docker exec -it redpanda-0 rpk topic describe transactions \ -X user=Sasha \ -X pass=sashapassword \ -X sasl.mechanism=SCRAM-SHA-256 \ -X brokers=redpanda-0:9092You have access to this topic.
Example output
SUMMARY
=======
NAME        transactions
PARTITIONS  1
REPLICAS    1

CONFIGS
=======
KEY                                   VALUE       SOURCE
cleanup.policy                        delete      DEFAULT_CONFIG
compression.type                      producer    DEFAULT_CONFIG
delete.retention.ms                   -1          DEFAULT_CONFIG
flush.bytes                           262144      DEFAULT_CONFIG
flush.ms                              100         DEFAULT_CONFIG
initial.retention.local.target.bytes  -1          DEFAULT_CONFIG
initial.retention.local.target.ms     -1          DEFAULT_CONFIG
max.message.bytes                     1048576     DEFAULT_CONFIG
message.timestamp.type                CreateTime  DEFAULT_CONFIG
redpanda.iceberg.delete               true        DEFAULT_CONFIG
redpanda.iceberg.mode                 disabled    DEFAULT_CONFIG
redpanda.leaders.preference           none        DEFAULT_CONFIG
redpanda.remote.delete                true        DEFAULT_CONFIG
redpanda.remote.read                  true        DEFAULT_CONFIG
redpanda.remote.write                 true        DEFAULT_CONFIG
retention.bytes                       -1          DEFAULT_CONFIG
retention.local.target.bytes          -1          DEFAULT_CONFIG
retention.local.target.ms             86400000    DEFAULT_CONFIG
retention.ms                          604800000   DEFAULT_CONFIG
segment.bytes                         134217728   DEFAULT_CONFIG
segment.ms                            1209600000  DEFAULT_CONFIG
write.caching                         true        DEFAULT_CONFIG
Explore Data transforms
Data transforms let you run common data streaming tasks on the Redpanda broker, like filtering, scrubbing, and transcoding. For example, you may have consumers that require you to redact credit card numbers or convert JSON to Avro.
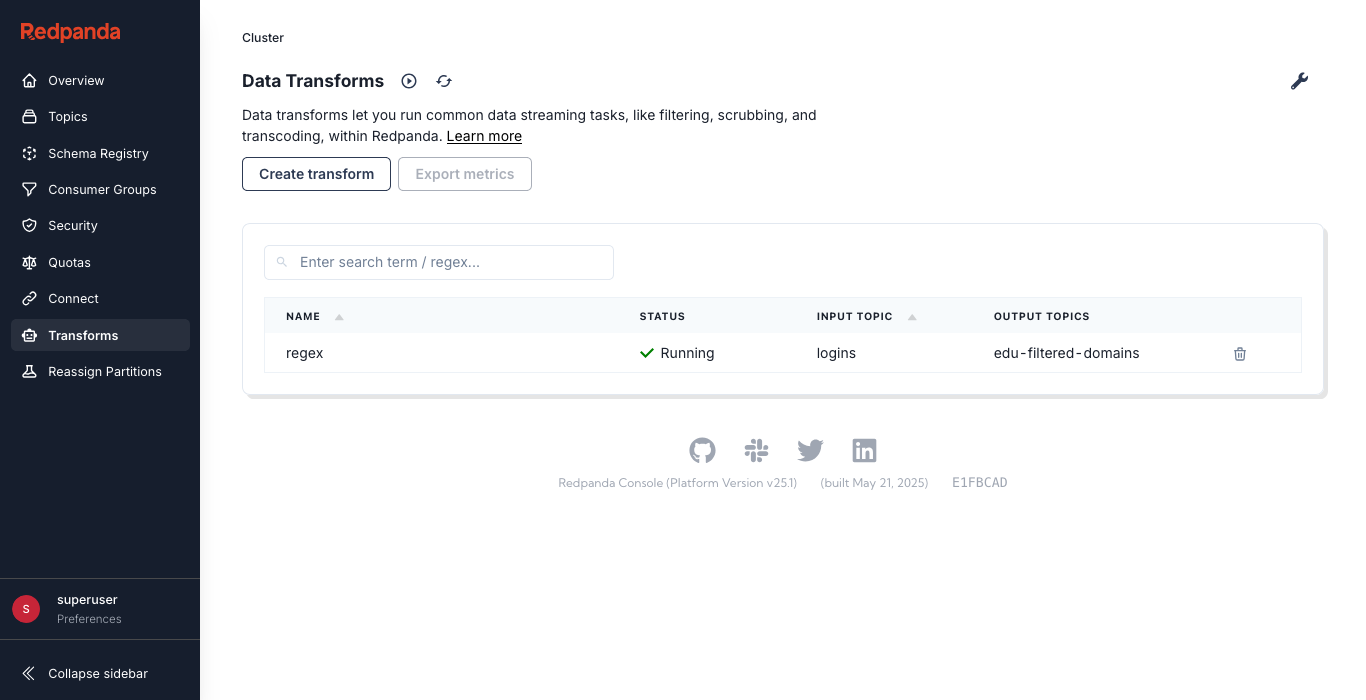
This quickstart deployment comes with one transform function called regex running in your cluster. Its job is to find records in the logins topic that contain email addresses with the .edu domain and add those to a new topic called edu-filtered-domains.
In the menu, click Transforms.
On the Transforms page, you see your transform. You can use Redpanda Console to manage and monitor your transforms.
The source code for the data transform function is in the docker-compose/transform/transform.go file that you downloaded. This file is commented to explain how it works.
|
See also:
View audit logs
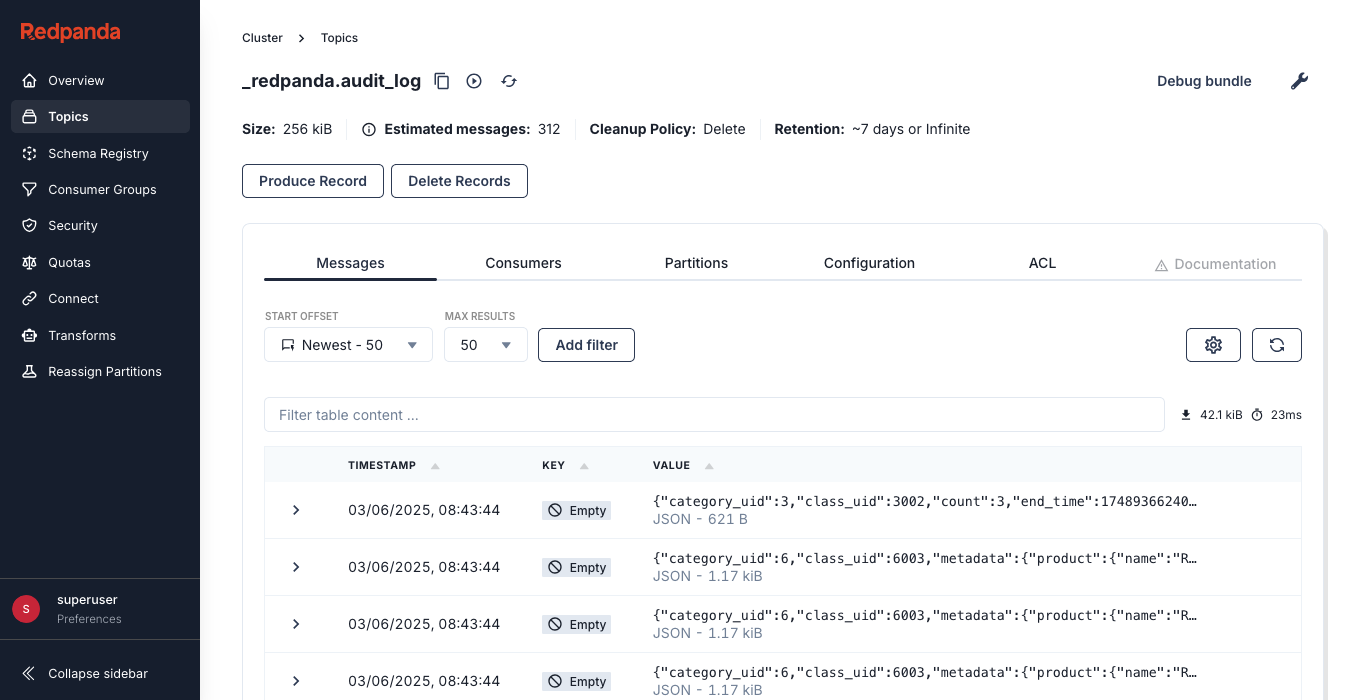
Audit logs provide a record of all user actions. You can use these logs to track changes, troubleshoot issues, and maintain compliance with your organization’s security policies.
-
In the menu, click Topics.
-
Click the Show internal topics checkbox.
-
Click the _redpanda.audit_log topic in the table.
See also: Audit Logging.
Start streaming
To start building a basic streaming application, you can use the Redpanda CLI (rpk) to create a topic, produce messages to it, and consume messages from it. Each Redpanda broker comes preinstalled with rpk, so you can use it inside one of the Redpanda broker’s Docker containers.
For simplicity, this quickstart uses the bootstrapped superuser (superuser) to perform all operations. The superuser has full administrative privileges, making it convenient for setup and exploration. However, to enhance security in a production environment, Redpanda Data recommends creating users with restricted permissions for each task.
To use rpk inside the Redpanda broker’s Docker container:
-
Get information about the cluster:
docker exec -it redpanda-0 rpk cluster info -X user=superuser -X pass=secretpassword -
Create a topic called chat-room:
docker exec -it redpanda-0 rpk topic create chat-room \
  --replicas 3 \ (1)
  --topic-config redpanda.remote.read=true \ (2)
  --topic-config redpanda.remote.write=true \ (3)
  -X user=superuser \
  -X pass=secretpassword
1 Set a replication factor of 3 to replicate the topic across all 3 brokers. This replication factor provides high availability and data durability. For more details, see Choose the replication factor. 2 Enable remote reads for this topic to read offloaded records from object storage. 3 Enable remote writes for this topic to offload older records to object storage. For more details, see Use Tiered Storage. Output:
TOPIC STATUS chat-room OK -
Produce a message to the topic:
docker exec -it redpanda-0 rpk topic produce chat-room -X user=superuser -X pass=secretpassword -
Enter a message, then press Enter:
Pandas are fabulous!Example output:
Produced to partition 0 at offset 0 with timestamp 1663282629789.
-
Press Ctrl+C to finish producing messages to the topic.
-
Consume one message from the topic:
docker exec -it redpanda-0 rpk topic consume chat-room --num 1 -X user=superuser -X pass=secretpasswordYour message is displayed along with its metadata:
{
  "topic": "chat-room",
  "value": "Pandas are fabulous!",
  "timestamp": 1663282629789,
  "partition": 0,
  "offset": 0
}
Connect to the cluster externally
It’s often more practical to connect to a remote cluster from your local machine with rpk. The docker-compose.yml file configured the containers to expose ports on your localhost, so you can communicate with the cluster outside the Docker network. To do so, download rpk on your local machine and configure it to connect to your cluster on the exposed ports.
-
Install
rpkon your local machine:-
Linux
-
macOS
-
amd64
-
arm64
curl -LO https://github.com/redpanda-data/redpanda/releases/latest/download/rpk-linux-amd64.zip &&
  mkdir -p ~/.local/bin &&
  export PATH="~/.local/bin:$PATH" &&
  unzip rpk-linux-amd64.zip -d ~/.local/bin/
curl -LO https://github.com/redpanda-data/redpanda/releases/latest/download/rpk-linux-arm64.zip && mkdir -p ~/.local/bin && export PATH="~/.local/bin:$PATH" && unzip rpk-linux-arm64.zip -d ~/.local/bin/You can use rpkon Windows only with WSL. However, commands that require Redpanda to be installed on your machine are not supported, such asrpk containercommands,rpk iotune, andrpk redpandacommands.-
If you don’t have Homebrew installed, install it.
-
To install or update
rpk, run:brew install redpanda-data/tap/redpanda
-
-
Create a profile to configure
rpkto connect to your cluster:rpk profile create quickstart --from-profile rpk-profile.yamlThe profile is configured in the docker-compose/rpk-profile.yamlfile that you downloaded. This file is commented to explain how it works. -
Get information about the cluster to test the connection:
rpk cluster infoThe Redpanda broker returns a list of all broker addresses, so rpkcan communicate with all brokers directly. Each broker returns its configuredadvertise-*address that matches the port to which the initial connection has been made. You can see examples of these addresses in the Docker Compose file that you downloaded.
View offloaded data in Tiered Storage
Tiered Storage keeps local disk usage stable and performance consistent by offloading older data to object storage. You can also use Tiered Storage to recover clusters or topics, mount and unmount topics from a cluster, and more.
| Redpanda supports Amazon S3, Azure ADLS, and Google GCS as object storage providers. For this quickstart, Redpanda uses MinIO as the object storage provider. MinIO is not supported for production deployments. |
-
Check the size of remote and local disks for the
chat-roomtopic you created earlier:rpk cluster logdirs describe --topics chat-roomBROKER DIR TOPIC PARTITION SIZE ERROR 0 /var/lib/redpanda/data chat-room 0 611 0 remote://redpanda chat-room 0 319 1 /var/lib/redpanda/data chat-room 0 611 1 remote://redpanda chat-room 0 319 2 /var/lib/redpanda/data chat-room 0 611 2 remote://redpanda chat-room 0 319
-
Local storage:
/var/lib/redpanda/dataholds recent data. -
Remote storage:
remote://redpandaholds offloaded data.
-
-
Open MinIO at http://localhost:9001/browser to view your data stored in the S3-compatible object store.
Login credentials:
-
Username:
minio -
Password:
redpandaTieredStorage7
-
See also: Use Tiered Storage.
Deploy a pipeline with Redpanda Connect
Redpanda Connect is a powerful tool that allows you to build and manage data streaming pipelines. It supports hundreds of connectors for various systems, enabling seamless data ingestion, transformation, and routing between different sources and sinks. Using declarative YAML configuration files and the rpk CLI, you can quickly set up and deploy complex data pipelines in Redpanda.
-
Deploy the example pipeline:
rpk connect run ../generate-profiles.yamlThis pipeline is configured to generate fake user profiles and produce them to the
profilestopic in your Redpanda cluster. It’ll run until you stop it.The pipeline configuration is in the docker-compose/generate-profiles.yamlfile that you downloaded. This file is commented to explain how it works. -
After a few seconds, stop the pipeline by pressing Ctrl+C.
-
Consume 10 messages from the
profilestopic to confirm that the pipeline produced data to that topic.rpk topic consume profiles --num 10
Extend your 30-day trial
Your initial trial license is valid for 30 days. To extend it by another 30 days:
-
Upload the new license to your running cluster using
rpk cluster license set:rpk cluster license set <license>Replace the
<license>placeholder with your license.This command applies the new license to your Redpanda cluster, extending your access to enterprise features for another 30 days.
-
Restart Redpanda Console so that it can fetch the new license from the Redpanda brokers:
docker restart redpanda-console
| You can extend the trial license only once. |
See also: Redpanda Licensing.
Clean up
To reset your environment, shut down the running processes and delete the containers:
docker compose downTo delete the volumes along with all your cluster data:
docker compose down -vCustomize the Docker quickstart
To customize this quickstart, you can configure Redpanda, Redpanda Console, or Redpanda Connect using the provided Docker Compose file. This allows you to tailor the services to fit your specific requirements.
Redpanda broker properties
To configure the Redpanda services with broker configuration properties, pass properties with the --set option in the redpanda start command in your Docker Compose file.
Example:
docker-compose.ymlredpanda-0: (1)
command: (2)
- redpanda
- start
- --set pandaproxy_client.retries=6 (3)| 1 | The service name in Docker Compose. |
| 2 | Overrides the default command for the Redpanda container. |
| 3 | Sets the pandaproxy_client.retries broker configuration property to 6. |
Redpanda cluster properties
Cluster-level configurations are defined in the bootstrap.yml file. This file is included in your Docker Compose setup. It contains essential settings that apply to the entire Redpanda cluster. You can find all cluster properties in Cluster Configuration Properties.
Example:
docker-compose.ymlredpanda:
volumes:
- ./bootstrap.yml:/etc/redpanda/.bootstrap.yaml (1)| 1 | Mounts the bootstrap.yml file from your local parent directory to the container’s /etc/redpanda/ directory. |
Redpanda Console configuration
Redpanda Console configuration is managed with the environment variable CONSOLE_CONFIG_FILE. You can specify the path to your configuration file in the Docker Compose file.
Example:
docker-compose.ymlconsole:
environment:
CONSOLE_CONFIG_FILE: |
# Configure a connection to the Redpanda cluster
# See https://docs.redpanda.com/current/console/config/connect-to-redpanda/
kafka:
brokers: ["redpanda-0:9092"]Redpanda Connect configuration
Existing data pipelines are configured using the CONNECT_CFG_FILE environment variable in the connect service. This environment variable contains YAML configuration settings for Redpanda Connect.
Example:
docker-compose.ymlconnect:
environment:
CONNECT_CFG_FILE: |
input:
generate:
interval: 1s
mapping: |
let first_name = fake("first_name")
let last_name = fake("last_name")
root.user_id = counter()
root.name = $$first_name + " " + $$last_name
root.email = ($$first_name.slice(0,1) + $$last_name + "@" + fake("domain_name")).lowercase()
root.ip = fake("ipv4")
root.login_time = now()
pipeline:
processors:
- mapping: |
root = range(0, random_int(min:2, max:4)).map_each(cust -> this)
- unarchive:
format: "json_array"
- mapping: |
if batch_index() == 0 {
meta topic = "logins"
root = this
} else {
meta topic = "transactions"
root.user_id = this.user_id
root.email = this.email
root.index = batch_index() - 1
root.product_url = fake("url")
root.price = fake("amount_with_currency")
root.timestamp = now()
}
output:
kafka_franz:
seed_brokers: [ "redpanda-0:9092" ]
topic: $${! metadata("topic") }
sasl:
- mechanism: SCRAM-SHA-256
password: secretpassword
username: superuserTo create new data pipelines, run rpk connect run, specifying the path to your own YAML configuration file:
rpk connect run <path-to-config>Next steps
Contact Redpanda to discuss using Redpanda Enterprise Edition in production.
